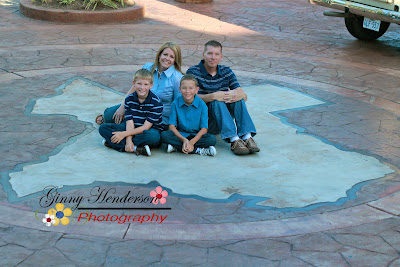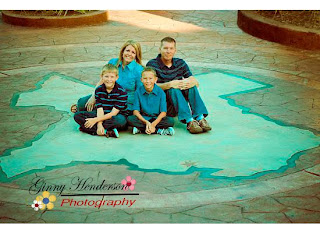
I took this picture last Saturday from the top of a brick wall in Kemah. When you have a family sitting on a large concrete Texas, you just have to get above them- right? Shortly after taking this picture, I fell off that wall. I was a little sore for a few days and I jacked up my hip, but I really am fine.
You can imagine how interested I was (after all of that) to see how this picture turned out. I was mostly pleased except for the car in the upper right corner. So I dropped the picture in to Photoshop Elements and got to work on covering up that car.
 So what did I do? I am glad you asked.
After playing with the color a little in Lightroom, I did this:
1. I cropped the picture as much as I could to get rid of as much of that car as possible
2. I used my quick selection tool to copy the flower bed in the upper left corner and then I pasted it over the car.
3. I didn't want the flower bed to be huge so I had to leave some car uncovered up in the corner. So I used my clone stamp tool to clone the grass and copy it over the car to make the flower bed look deeper
4. Then I used my blur tool around the bottom edge of the flower bed to blend it in so it did not look like a sticker on top of the tiles.
I did essentially the same thing for a friend the other day who wanted me to replace his mother in law's closed eyes in a picture. I think the blur tool and the clone stamp tool are the secret to making this trick look natural. On the eye switch, I had to clone stamp some skin changes.
Let me know if you have any questions


1 comment:
it's amazing what you can do with PE. I may have to put it on my Christmas wish list. :)
Post a Comment